SD-WAN
{Back to Index}
Table of Contents
1 环境搭建
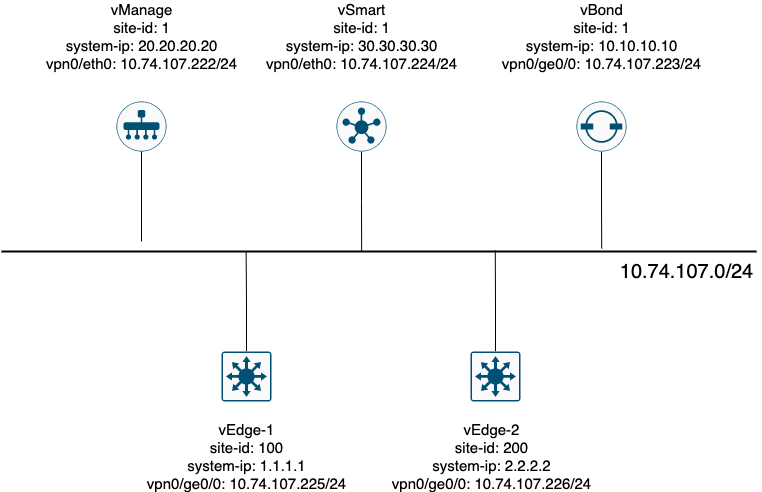
Figure 1: 实验环境
1.1 安装
vManage/vSmart/vBond (v16.3.2)
vManage 需要一块额外的硬盘,给 200G 够了。
- vEdge (v17.1)
1.2 Bootstrap Configuration
1.3 准备证书 (vManage as Root CA)
generate ROOTCA on vManage
! ###################################################
! #               vMange vshell                     #
! ###################################################

openssl genrsa -out ROOTCA.key 2048
openssl req -x509 -new -nodes -key ROOTCA.key -sha256 -days 1024 \
-subj "/C=CN/ST=SH/L=SH/O=cbd/CN=sdwan.lab" \
-out ROOTCA.pem
#
install root certificate on all devices
! ###################################################
! #             vSmart/vBond/vEdges/vManage         #
! ###################################################
# Excecute the following command in CLI mode on all devices
request root-cert-chain install scp://admin@10.74.107.222:/home/admin/ROOTCA.pem vpn 0
# can check with: show certificate root-ca-cert
1.4 Configuration on vManage GUI
1.4.1 基本设置
Administration > Settings
set the Organization Name to be the right one (in this case, it should be cbd ), then edit the vBond address, and set it to 10.74.107.223 .
Make sure that Certificate Authorization is set to Manual .
1.4.2 添加 Controllers
Configuration > Devices > Controllers > Add Controller
将 vBond/vSmart 添加进去, 不要勾选 Generate CSR
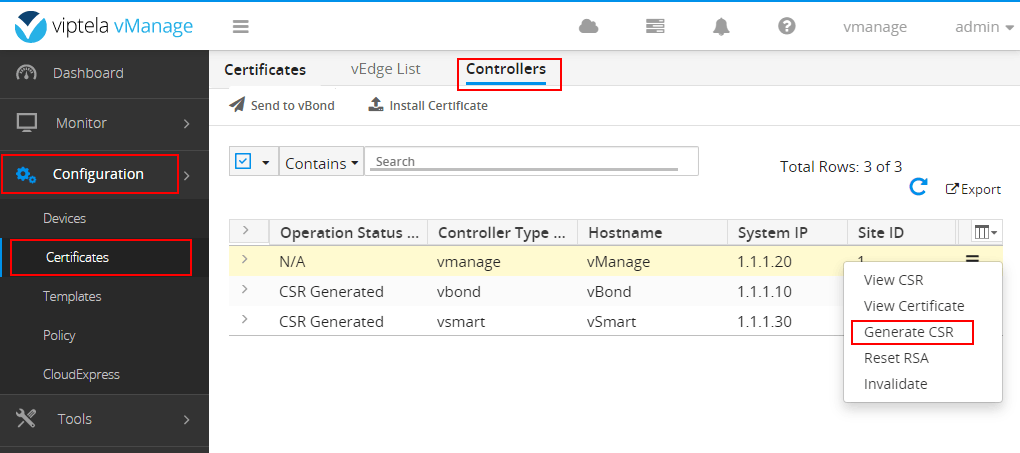
1.4.3 Generate CSR
Configuration > Certificates > Controllers
Click Generate CSR for all 3 Controllers.
1.4.4 在 vManage 上签发证书
! ####################### vManage vshell #######################

scp admin@10.74.107.223:/home/admin/vbond_csr vBond.csr
scp admin@10.74.107.224:/home/admin/vsmart_csr vSmart.csr
cp vmanage_csr vManage.csr

openssl x509 -req -in vBond.csr \
    -CA ROOTCA.pem -CAkey ROOTCA.key -CAcreateserial \
    -out vBond.crt -days 500 -sha256

openssl x509 -req -in vSmart.csr \
    -CA ROOTCA.pem -CAkey ROOTCA.key -CAcreateserial \
    -out vSmart.crt -days 500 -sha256

openssl x509 -req -in vManage.csr \
   -CA ROOTCA.pem -CAkey ROOTCA.key -CAcreateserial \
   -out vManage.crt -days 500 -sha256
1.4.5 安装签发的证书
Configuration > Certificates > Controllers > Install Certificate
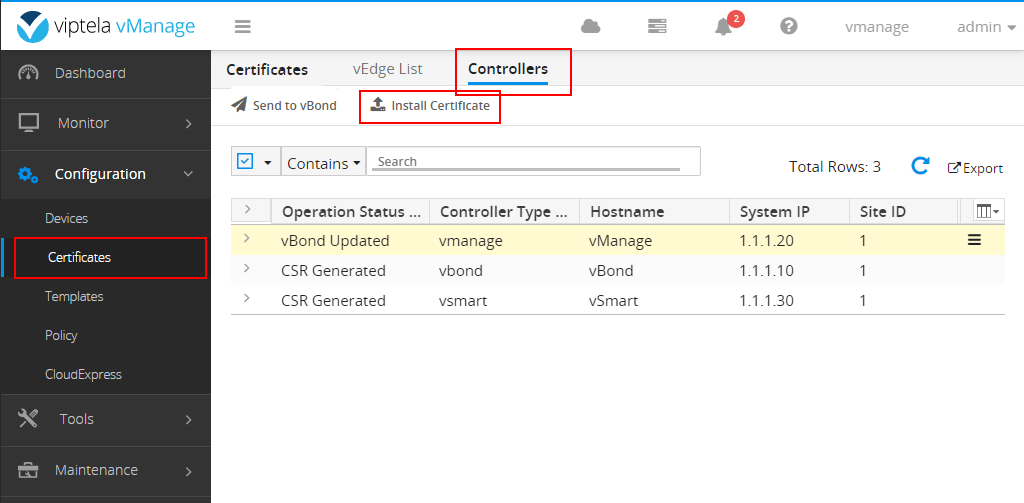
Send-to-vBond function to propagate this information to vBond.

1.5 vEdges Validation
1.5.1 上传 CSR
organization name 必须要和 vManage 上配置的一致。
1.5.2 vManage 签发 vEdges 证书
1.5.3 vEdges 安装证书
1.5.4 上传 vedges.csv (option 1)
Configuration > Devices > vEdge List > Upload vEdge List
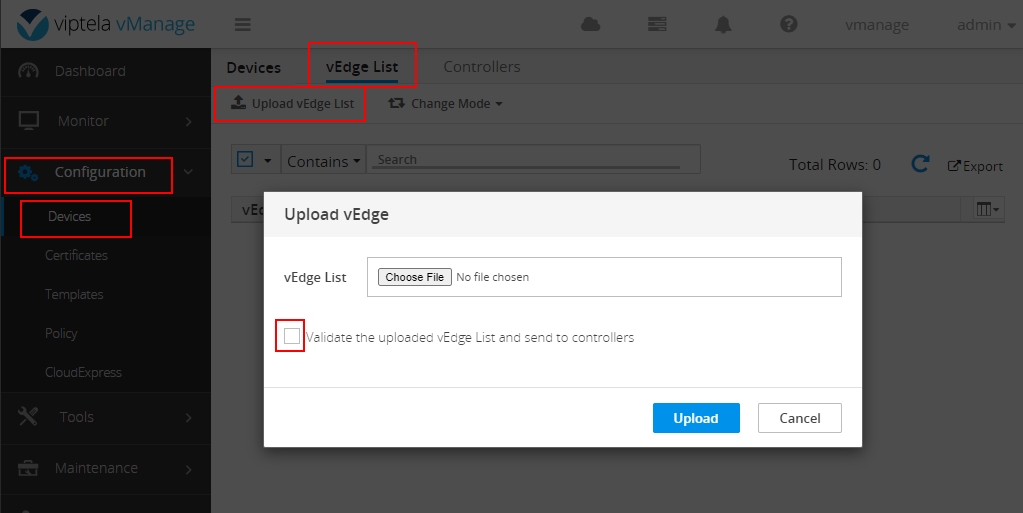
Figure 5: Make sure to check the "Validate the uploaded vEdge list and send to controllers" option.
最后, Configuration > Certificates > WAN Edge List Send to Controllers
1.5.5 手动输入 chassis/sn (option 2)
在 vmanage, vbond, vsmart 运行如下命令,就可以把他们添加进来,适合所有版本, 用这种方式可以直接安装所需要的版本,无需通过升级。 1
缺点是,每次重启都要重新输入该命令。。。
request vedge add chassis-num <CN> serial-num <SN>
1.6 Tunnel-Interfaces bring up
# on vManage and vSmart
!
vpn 0
 interface eth0
  tunnel-interface
!
commit

# on vBond and vEdges
!
vpn 0
 interface ge0/0
  tunnel-interface
   encapsulation ipsec
   allow-service all
!
commit
到此为止,3 个控制器全部上线,vEdges 还不能上线,要等版本升级之后才能上线。
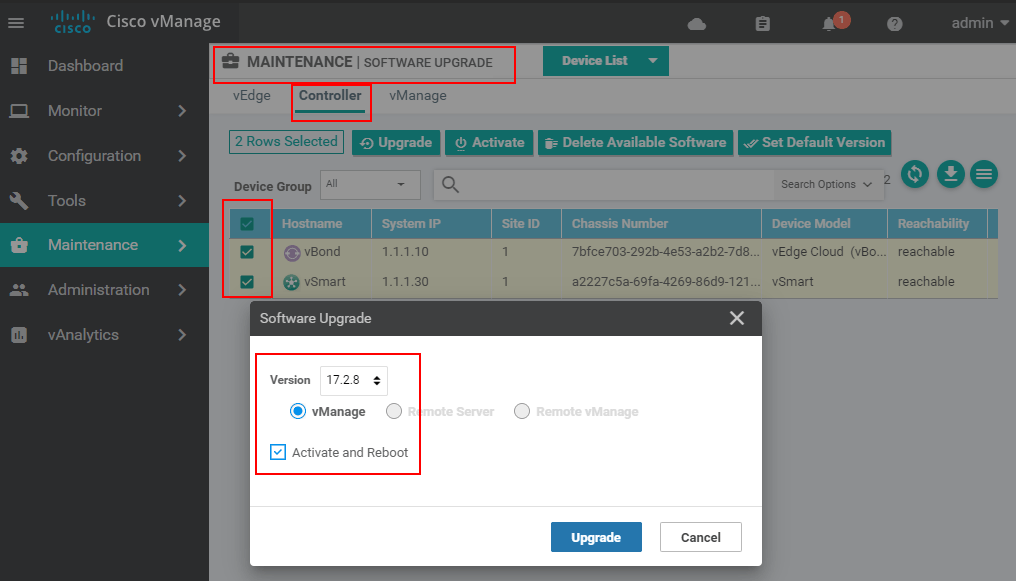
1.7 升级版本
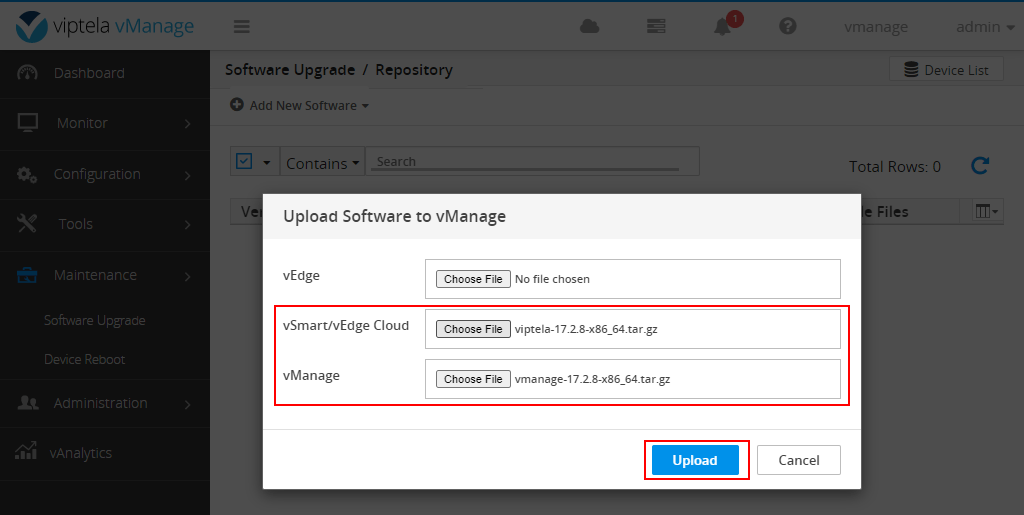
1.7.1 上传 upgrade images
Maintenance > Software Upgrade > Controller > Repository > Add new software
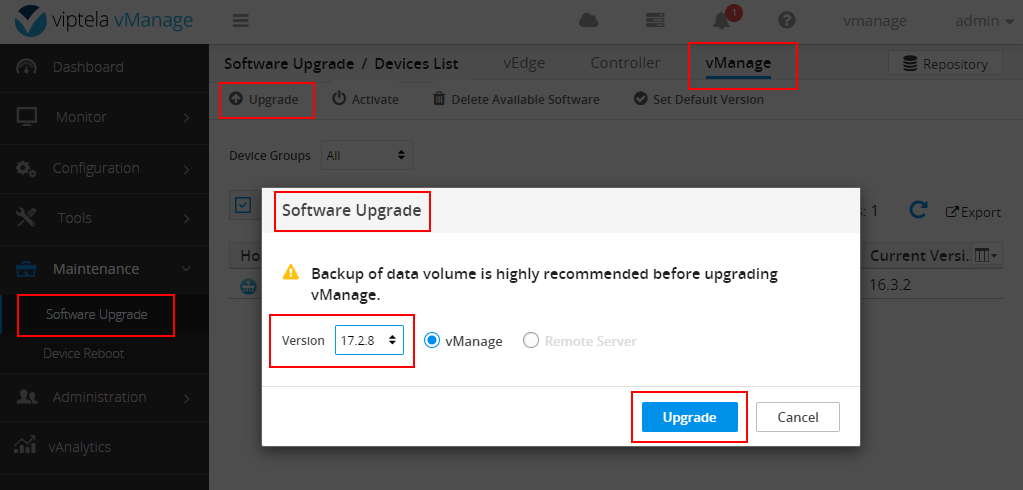
1.7.2 升级 vManage
Maintenance > Software Upgrade > vManage > Upgrade
1.7.3 Activate
Maintenance > Software Upgrade > vManage > Activate
The controller will reload. The process usually takes some time.
1.7.4 升级 VBond/vSmart
Maintenance > Software Upgrade > Controller